Nlog是.NET几大成熟的日志框架,可以配置写入到文件,也可以配置写入到数据库,从.net framework开始就比较成熟了。到了.NET Core时代,NLog也紧跟时代,现在已经更新到5.0版本。本文将讲述NLog在.NET6下的简单使用。
一、环境准备
新建一个.NET6的MVC项目,并在nuget添加NLog包,由于是asp.net mvc项目需要如下包NLog.Web.AspNetCore。安装命令如下:.
install-package NLog.Web.AspNetCore二、添加项目配置文件nlog.config
点击项目右键添加nlog.config文件,然后复制下面的Xml内容
<?xml version="1.0" encoding="utf-8" ?><nlog xmlns="http://www.nlog-project.org/schemas/NLog.xsd"xmlns:xsi="http://www.w3.org/2001/XMLSchema-instance"autoReload="true"internalLogLevel="Info"internalLogFile="c:\temp\internal-nlog-AspNetCore.txt"><!-- enable asp.net core layout renderers --><extensions><add assembly="NLog.Web.AspNetCore"/></extensions><!-- the targets to write to --><targets><!--配置文件位置,配置为项目生成目录,单个文件过大会导致写入效率下降,可配置单个文件的最大容量--><target name="File" xsi:type="AsyncWrapper" queueLimit="5000" overflowAction="Discard"><target xsi:type="File"fileName="${basedir}/logs/${shortdate}.log"layout="${date:yyyy-MM-dd HH\:mm\:ss} ${level:uppercase=true} ${event-context:item=Action} ${message} ${event-context:item=Amount} ${stacktrace}"archiveAboveSize="10240"archiveEvery="Day"/></target><!--配置文件位置,下面是默认的配置,存放的位置为C盘--><!-- File Target for all log messages with basic details --><!--<target xsi:type="File" name="allfile" fileName="c:\temp\nlog-AspNetCore-all-${shortdate}.log"layout="${longdate}|${event-properties:item=EventId:whenEmpty=0}|${level:uppercase=true}|${logger}|${message} ${exception:format=tostring}" />--><!-- File Target for own log messages with extra web details using some ASP.NET core renderers --><!--<target xsi:type="File" name="ownFile-web" fileName="c:\temp\nlog-AspNetCore-own-${shortdate}.log"layout="${longdate}|${event-properties:item=EventId:whenEmpty=0}|${level:uppercase=true}|${logger}|${message} ${exception:format=tostring}|url: ${aspnet-request-url}|action: ${aspnet-mvc-action}|${callsite}" />--><!--Console Target for hosting lifetime messages to improve Docker / Visual Studio startup detection --><!--<target xsi:type="Console" name="lifetimeConsole" layout="${MicrosoftConsoleLayout}" />--></targets><!-- 配置日志级别 --><rules><logger name="*" minlevel="Debug" maxlevel="Error" writeTo="File" /><!-- 下面是默认的配置--><!--All logs, including from Microsoft--><!--<logger name="*" minlevel="Trace" writeTo="allfile" />--><!--Output hosting lifetime messages to console target for faster startup detection --><!--<logger name="Microsoft.Hosting.Lifetime" minlevel="Info" writeTo="lifetimeConsole, ownFile-web" final="true" />--><!--Skip non-critical Microsoft logs and so log only own logs (BlackHole) --><!--<logger name="Microsoft.*" maxlevel="Info" final="true" /><logger name="System.Net.Http.*" maxlevel="Info" final="true" /><logger name="*" minlevel="Trace" writeTo="ownFile-web" />--></rules></nlog>
layout是配置日期等布局格式。
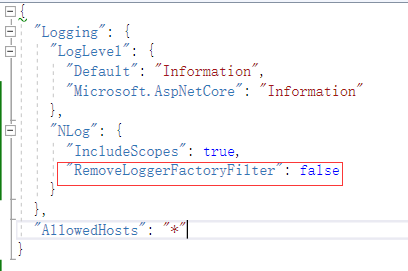
rules节点是配置日志的级别,跟微软默认的日志级别类似。如果使用appsettings.json的日志级别需要配置RemoveLoggerFactoryFilter = false
三、在Program.cs添加Nlog组件
using NLog;using NLog.Web;var logger = NLog.LogManager.Setup().LoadConfigurationFromAppSettings().GetCurrentClassLogger();logger.Debug("init main");try{var builder = WebApplication.CreateBuilder(args);// Add services to the container.builder.Services.AddControllersWithViews();// NLog:注册Nlog组件builder.Logging.ClearProviders();builder.Host.UseNLog();var app = builder.Build();// Configure the HTTP request pipeline.if (!app.Environment.IsDevelopment()){app.UseExceptionHandler("/Home/Error");}app.UseStaticFiles();app.UseRouting();app.UseAuthorization();app.MapControllerRoute(name: "default",pattern: "{controller=Home}/{action=Index}/{id?}");app.Run();}catch (Exception exception){// NLog: 抓取全局错误logger.Error(exception, "Stopped program because of exception");throw;}finally{// 确保在跑出异常停止线程 (避免在linux中报错)NLog.LogManager.Shutdown();}
四、日志使用
配置完成就可以使用Nlog了,跟默认的日志注入一样,代码如下:
private readonly ILogger<HomeController> _logger;public HomeController(ILogger<HomeController> logger){_logger = logger;}public IActionResult Index(){_logger.LogInformation("Hello,这是主页面!");return View();}
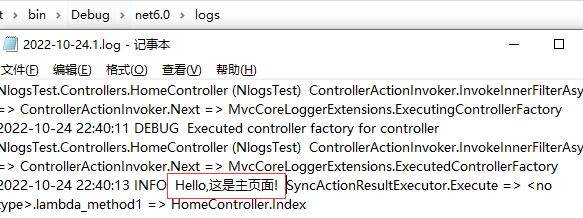
五、查看日志
以上工作完成后就可以在生成环境里logs里的日志文件了。
篇幅有限具体说明请看官方文档
https://github.com/NLog/NLog
源码链接:
https://pan.baidu.com/s/1T8HU06y4C1JxzRty5AAHEg?pwd=0qae
