1,背景介绍
在之前的文章 - 交互式 .Net 中已经介绍了什么是 交互式 .Net,文中是通过 Visual Studio Code 插件的方式实现 交互式 .Net 的。现在,我们将使用容器的方式实现 交互式 .Net。.
2,镜像构建
1. Dockerfile
FROM mcr.microsoft.com/dotnet/sdk:6.0-focal
ARG HTTP_PORT_RANGE=1100-1200
# Opt out of telemetry until after we install jupyter when building the image, this prevents caching of machine id
ENV DOTNET_INTERACTIVE_CLI_TELEMETRY_OPTOUT=true

# Install all OS dependencies for notebook server that starts but lacks all
# features (e.g., download as all possible file formats)

ENV DEBIAN_FRONTEND noninteractive
RUN sed -i 's|https\?://[^/]\+/|http://mirrors.aliyun.com/|' /etc/apt/sources.list
RUN apt-get update \
 && apt-get install -yq --no-install-recommends \
    wget \
    bzip2 \
    ca-certificates \
    sudo \
    locales \
    fonts-liberation \
    run-one \
    python3.8 \
    python3-pip \
 && apt-get clean && rm -rf /var/lib/apt/lists/*

RUN echo "en_US.UTF-8 UTF-8" > /etc/locale.gen && \
    locale-gen

RUN python3 -m pip install setuptools
RUN python3 -m pip install jupyter
RUN python3 -m pip install jupyterlab

# Add package sources
RUN dotnet nuget add source "https://pkgs.dev.azure.com/dnceng/public/_packaging/dotnet-tools/nuget/v3/index.json" -n "dotnet-tools"
RUN dotnet nuget add source "https://pkgs.dev.azure.com/dnceng/public/_packaging/dotnet6/nuget/v3/index.json" -n "dotnet6"
RUN dotnet nuget add source "https://pkgs.dev.azure.com/dnceng/public/_packaging/MachineLearning/nuget/v3/index.json" -n "MachineLearning"

# Install lastest build from master branch of Microsoft.DotNet.Interactive
RUN dotnet tool install --tool-path /usr/share/dotnet-interactive Microsoft.dotnet-interactive --add-source "https://pkgs.dev.azure.com/dnceng/public/_packaging/dotnet-tools/nuget/v3/index.json"
RUN ln -s /usr/share/dotnet-interactive/dotnet-interactive /usr/bin/dotnet-interactive
RUN dotnet interactive jupyter install --http-port-range ${HTTP_PORT_RANGE}

# Enable telemetry once we install jupyter for the image
ENV DOTNET_INTERACTIVE_CLI_TELEMETRY_OPTOUT=false

EXPOSE 8888
EXPOSE ${HTTP_PORT_RANGE}

RUN groupadd -g 1337 jupyter
#RUN groupdel jupyter

RUN mkdir notebooks

WORKDIR notebooks

ENV TOKEN ''

ENTRYPOINT jupyter lab --ip=0.0.0.0  --allow-root  --notebook-dir=/notebooks/ --ServerApp.token=${TOKEN}
2. 构建镜像
docker build -t dotnet-interactive:1.0.0 .
3,启动容器
执行以下指令启动容器:
docker run --name dotnet-interactive -d -e TOKEN=123456 -v /root/notebooks:/notebooks -p 80:8888 dotnet-interactive:1.0.0
指令解析:
| docker run | 启动 docker 容器 |
| -- name dotnet-interactive | 设置容器名称为 nginx |
| -d | 后台运行 |
| -e TOKEN=123456 | 设置访问密码为 123456,可根据需要进行调整 |
| -v /root/notebooks:/notebooks | 把容器目录挂载到宿主机 |
| -p 80:8888 | 把宿主机的 80 端口映射到容器的 8888 端口 |
| dotnet-interactive:1.0.0 | 使用镜像 |
4,使用介绍
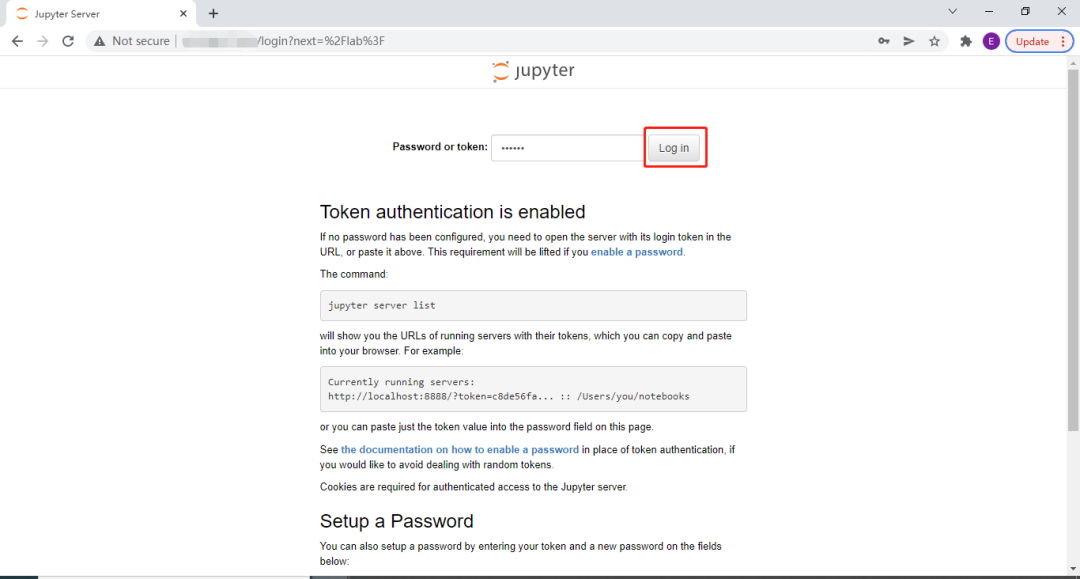
1. 打开网页并登录
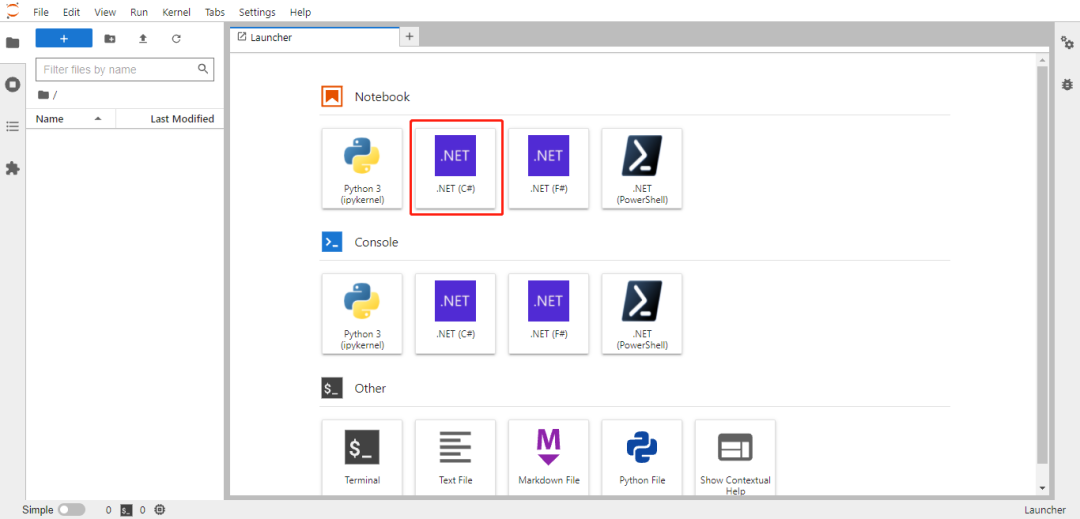
2. 新建 Notebook
3. 解析 Markdown
输入一段 markdown 内容,并选择 Markdown,使用热键 Alt+Enter 查看结果

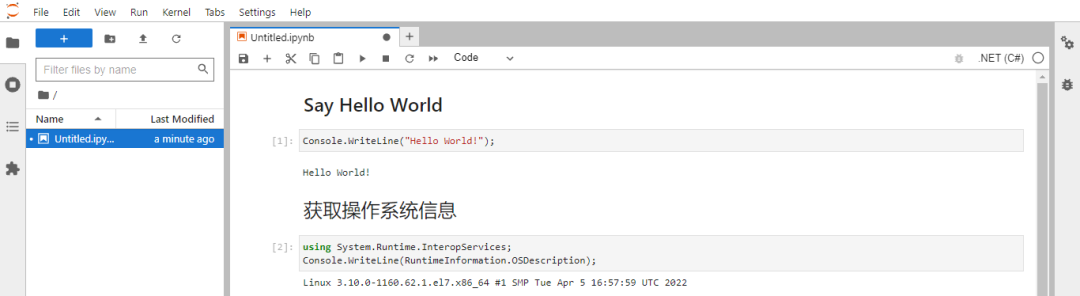
4. 执行 C# 代码
输入一段 C# 代码,并选择 Code,使用热键 Alt+Enter 查看结果

5. 获取操作系统信息
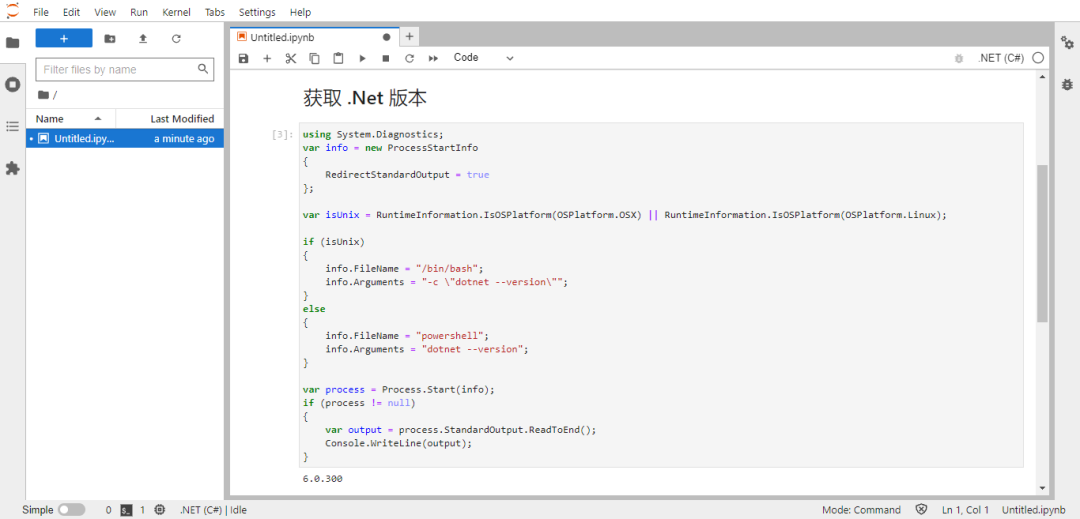
6. 获取 .Net 版本
7. 获取 ipynb 文件
可以在宿主机的 /root/notebooks 路径下获取刚才操作的 ipynb 文件:

5,参考总结
以上就是本文希望分享的内容,其中 interactive 的 Github 地址为:https://github.com/dotnet/interactive
