前言
ImageSharp是对.NET Core平台扩展的一个图像处理方案,以往网上的案例多以生成文字及画出简单图形、验证码等方式进行探讨和实践。
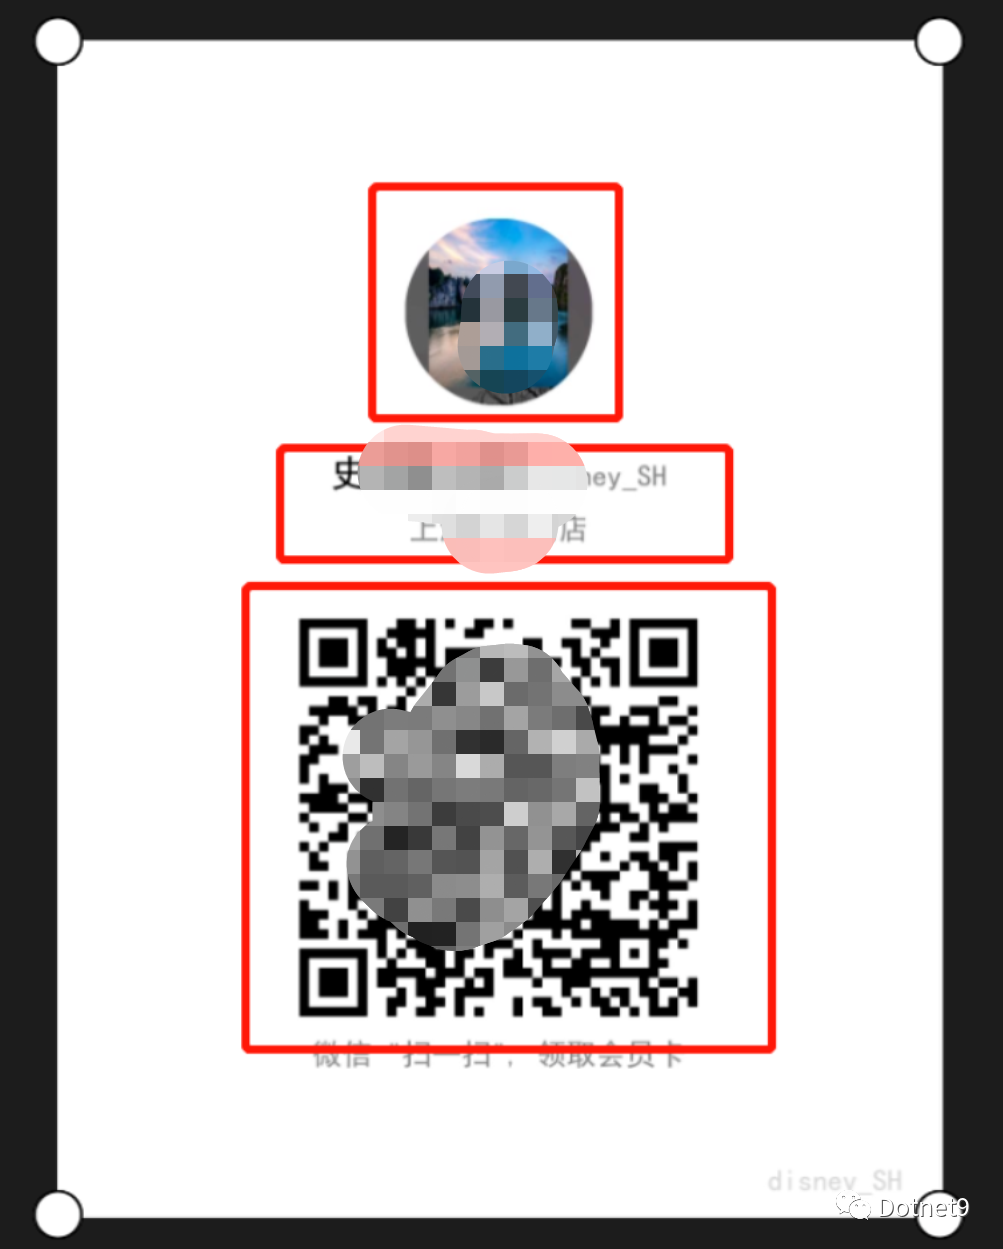
分享一下所在公司项目的实际应用案例,导出微信二维码图片,圆形头像等等。.
一、源码获取
Git项目地址:https://github.com/SixLabors/ImageSharp
安装这两个包即可:
Install-Package SixLabors.ImageSharp -Version 1.0.0-beta0001
Install-Package SixLabors.ImageSharp.Drawing -Version 1.0.0-beta0001
二、应用
1、在图片中画出文字
首先要注意字体问题,Windows自带的字体一般存储于 C:\Windows\Fonts 文件夹内,如果是部署在Linux系统的应用程序,则存储于 usr/share/fonts 文件夹内。
以黑体为例,我们找到对应的字体文件 SIMHEI.TTF ,将其放入项目的根目录内方便调用。
var path = "Image/Mud.png"             //图片路径
FontCollection fonts = new FontCollection();
FontFamily fontfamily = fonts.Install("Source/SIMHEI.TTF"); //字体的路径     var font  = new Font(fontfamily,50);
using (Image<Rgba32> image = Image.Load(path))
{
    image.Mutate(x => x.DrawText (
              "陆家嘴旗舰店",           //文字内容
              font,
              Rgba32.Black,           //文字颜色
              new PointF(100,100))    //坐标位置(浮点)
       );
   image.Save(path);
 }
关于Image.Load()获取图片方法的使用,可以直接读取Stream类型的流,也可以根据图片的本地路径获取。
//线上地址的图片,通过获取流的方式读取
WebRequest imgRequest = WebRequest.Create(url);
var res = (HttpWebResponse)imgRequest.GetResponse();
var image  = Image.Load(res.GetResponseStream());
获取文字的像素宽度,可以使用:
var str = "我是什么长度";
var size = TextMeasurer.Measure(str, new RendererOptions(new Font(fontfamily,50)));
var width = size.Width;
2、在图片中画出圆形的头像
在ImageSharp的源码中,发现有画圆形的工具类可以使用,在这里直接copy出来。
using SixLabors.ImageSharp;
using SixLabors.ImageSharp.PixelFormats;
using SixLabors.ImageSharp.Processing;
using SixLabors.Primitives;
using SixLabors.Shapes;
using System;
using System.Collections.Generic;
using System.Text;

namespace CodePicDownload
{
    public static class CupCircularHelper
    {

        public static IImageProcessingContext<Rgba32> ConvertToAvatar(this IImageProcessingContext<Rgba32> processingContext, Size size, float cornerRadius)
        {
            return processingContext.Resize(new ResizeOptions
            {
                Size = size,
                Mode = ResizeMode.Crop
            }).Apply(i => ApplyRoundedCorners(i, cornerRadius));
        }


        // This method can be seen as an inline implementation of an `IImageProcessor`:
        // (The combination of `IImageOperations.Apply()` + this could be replaced with an `IImageProcessor`)
        private static void ApplyRoundedCorners(Image<Rgba32> img, float cornerRadius)
        {
            IPathCollection corners = BuildCorners(img.Width, img.Height, cornerRadius);

            var graphicOptions = new GraphicsOptions(true)
            {
                AlphaCompositionMode = PixelAlphaCompositionMode.DestOut // enforces that any part of this shape that has color is punched out of the background
            };
            // mutating in here as we already have a cloned original
            // use any color (not Transparent), so the corners will be clipped
            img.Mutate(x => x.Fill(graphicOptions, Rgba32.LimeGreen, corners));
        }

        private static IPathCollection BuildCorners(int imageWidth, int imageHeight, float cornerRadius)
        {
            // first create a square
            var rect = new RectangularPolygon(-0.5f, -0.5f, cornerRadius, cornerRadius);

            // then cut out of the square a circle so we are left with a corner
            IPath cornerTopLeft = rect.Clip(new EllipsePolygon(cornerRadius - 0.5f, cornerRadius - 0.5f, cornerRadius));

            // corner is now a corner shape positions top left
            //lets make 3 more positioned correctly, we can do that by translating the orgional artound the center of the image

            float rightPos = imageWidth - cornerTopLeft.Bounds.Width + 1;
            float bottomPos = imageHeight - cornerTopLeft.Bounds.Height + 1;

            // move it across the width of the image - the width of the shape
            IPath cornerTopRight = cornerTopLeft.RotateDegree(90).Translate(rightPos, 0);
            IPath cornerBottomLeft = cornerTopLeft.RotateDegree(-90).Translate(0, bottomPos);
            IPath cornerBottomRight = cornerTopLeft.RotateDegree(180).Translate(rightPos, bottomPos);

            return new PathCollection(cornerTopLeft, cornerBottomLeft, cornerTopRight, cornerBottomRight);
        }
  }
}
有了画圆形的方法,我们只需要调用ConvertToAvatar() 方法把方形的图片转为圆形,画在图片上即可。
using (Image<Rgba32> image = Image.Load("Image/Mud.png"))
{
    var logoWidth = 300;
    var logo = Image.Load("Image/Logo.png")5     logo.Mutate(x => x.ConvertToAvatar(new Size(logoWidth, logoWidth), logoWidth / 2));
    image.Mutate(x => x.DrawImage(logo, new Point(100, 100), 1));
    Image.Save("..");
}
3、处理二维码的BitMatrix类型
以微信获取的二维码类型为例,因为我的项目中二维码是从微信公众号平台API获取,在这次获取图片中,将BitMatrix类型转换为流的格式从而可以通过Image.Load()方法获取图片信息成为了关键。
在这里我还是引用到了System.Drawing,可以单独提取公用方法。
public void WriteToStream(BitMatrix QrMatrix, ImageFormat imageFormat, Stream stream)
{
    if (imageFormat != ImageFormat.Exif && imageFormat != ImageFormat.Icon && imageFormat != ImageFormat.MemoryBmp)
    {
        DrawingSize size = m_iSize.GetSize(QrMatrix?.Width ?? 21);
        using (Bitmap bitmap = new Bitmap(size.CodeWidth, size.CodeWidth))
        {
            using (Graphics graphics = Graphics.FromImage(bitmap))
            {
                Draw(graphics, QrMatrix);
                bitmap.Save(stream, imageFormat);
            }
        }
    }
}
这样数据就存入了stream中,但直接用ImageSharp去Load处理过的流可能会有些问题,为了保险,我将数据流中的byte取出,实例化了一个新的MemoryStream类型。
这样,就可以获取到二维码的图片了。
//Matrix为BitMatrix类型数据,ImageFormat我选择了png类型
MemoryStream ms = new MemoryStream();
WriteToStream(Matrix,System.Drawing.Imaging.ImageFormat.Png, ms);
byte[] data = new byte[ms.Length];
ms.Seek(0, SeekOrigin.Begin);
ms.Read(data, 0, Convert.ToInt32(ms.Length));
var image =  Image.Load(new MemoryStream(data));
最后附上保存后图片的效果: