Knife4j的前身是swagger-bootstrap-ui,前身swagger-bootstrap-ui是一个纯swagger-ui的ui皮肤项目
官网实战指南:https://doc.xiaominfo.com/knife4j/action/dotnetcore-knife4j-guid.html
1.安装IGeekFan.AspNetCore.Knife4jUI包.
Install-Package IGeekFan.AspNetCore.Knife4jUI
2.服务配置
services.AddSwaggerGen(c =>
            {
                c.SwaggerDoc("v1", new OpenApiInfo { Title = "LT.PropertyManage.WebApi", Version = "v1" });
                c.AddServer(new OpenApiServer()
                {
                    Url = "",
                    Description = "vvv"
                });
                c.CustomOperationIds(apiDesc =>
                {                    var controllerAction = apiDesc.ActionDescriptor as ControllerActionDescriptor;                    return controllerAction.ControllerName + "-" + controllerAction.ActionName;
                });                var filePath = Path.Combine(AppContext.BaseDirectory, "LT.PropertyManage.WebApi.xml");
                c.IncludeXmlComments(filePath, true);
            });
3.中间件配置
app.UseKnife4UI(c =>
            {
                c.RoutePrefix = string.Empty; ; // serve the UI at root
                c.SwaggerEndpoint("/v1/api-docs", "LT.PropertyManage.WebApi v1");
            });

            app.UseEndpoints(endpoints =>
            {
                endpoints.MapControllers();
                endpoints.MapSwagger("{documentName}/api-docs");
            });
4.修改launchSettings.json文件
将"launchUrl": "swagger"改为
"launchUrl": ""
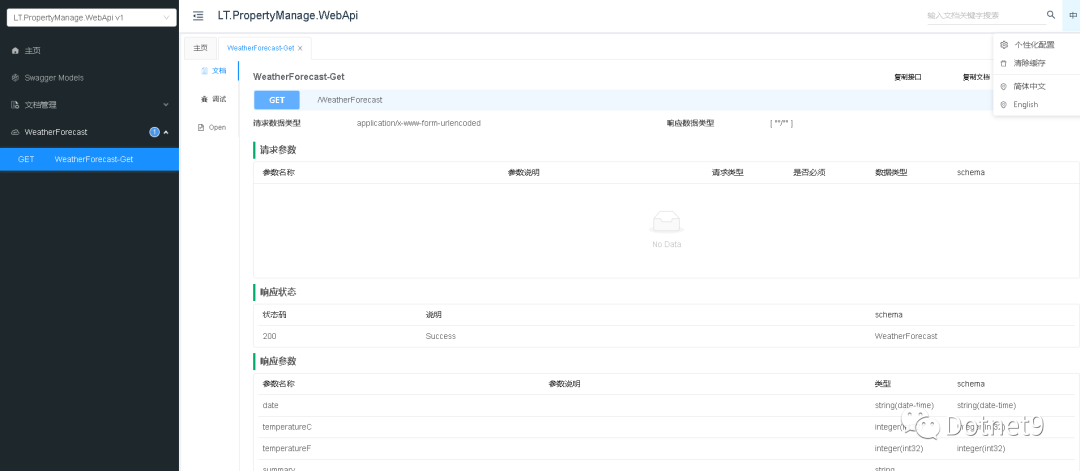
5.效果图