1 基础配置
在我们构建身份管理服务时,ABP vNext框架已帮我们创建身份认证服务,项目名称为Demo.Identity.IdentityServer
按我们原定的代码结构设置,我们在解决方案目录下添加文件夹identityserver并将该项目移动到该文件夹,之后我们调整解决中的项目结构,如下图:.
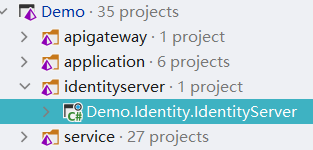
Demo.Identity.IdentityServer项目依赖身份管理服务中的Demo.Identity.EntityFrameworkCore项目,调整后其相对路径会发生变化,需重新引用或修改项目引用路径。
在IdentityIdentityServerModule类ConfigureServices方法中,我们可以找到如下代码:
if (hostingEnvironment.IsDevelopment()){Configure<AbpVirtualFileSystemOptions>(options =>{options.FileSets.ReplaceEmbeddedByPhysical<IdentityDomainSharedModule>(Path.Combine(hostingEnvironment.ContentRootPath, $"..{Path.DirectorySeparatorChar}Demo.Identity.Domain.Shared"));options.FileSets.ReplaceEmbeddedByPhysical<IdentityDomainModule>(Path.Combine(hostingEnvironment.ContentRootPath, $"..{Path.DirectorySeparatorChar}Demo.Identity.Domain"));});}
此处为虚拟文件系统所加载的文件路径,此路径已发生变化,我们可以对其进行修改,但在目前的使用场景中,我们可以直接将此代码注释或删除。
修改Demo.Identity.IdentityServer项目的配置文件appsettings.json,将数据库链接指向与身份管理服务相同的数据库,并配置Redis链接字符串。
按规划,我们将该服务端口号设置为4100,即在appsettings.json中添加配置如下:
"urls": "http://*:4100"2 自定义IdentityServer客户端
ABP vNext框架使用Application方式模板生成时,已经给我们生成了默认IdentityServer服务所需要的API、Client等数据并在数据初始化时存入数据库中,这里,我们可以在身份管理服务的Demo.Identity.Domain项目中IdentityServer文件夹下的IdentityServerDataSeedContributor类中找到想对应的代码,在运行Demo.Identity.DbMigrator项目时,会将数据存入Demo_Identity数据库中以IdentityServer开头的对应表中。
这里我们可以添加自己所需要的客户端认证方式,在IdentityServerDataSeedContributor类的CreateClientsAsync方法最后,我们加入以下代码:
await CreateClientAsync(name: "Demo_App",scopes: commonScopes,grantTypes: new[] { "password" },secret: "1q2w3e*".Sha256(),requireClientSecret: false,redirectUri: "",postLogoutRedirectUri: "");
这样我们就添加了一个名称为Demo_App的client,密码为1q2w3e*,可使用用户名密码登录。
如果我们需要使用刷新密码机制,在IdentityServerDataSeedContributor类的CreateClientsAsync方法开头位置我们可以找到commonScopes的定义,在其中添加一项“offline_access”,如下:
var commonScopes = new[]{"email","openid","profile","role","phone","address","Identity","offline_access"};
在IdentityServerDataSeedContributor类的CreateClientAsync方法中,我们会找到如下代码:
client = await _clientRepository.InsertAsync(new Client(_guidGenerator.Create(),name){ClientName = name,ProtocolType = "oidc",Description = name,AlwaysIncludeUserClaimsInIdToken = true,AllowOfflineAccess = true,AbsoluteRefreshTokenLifetime = 31536000, //365 daysAccessTokenLifetime = 31536000, //365 daysAuthorizationCodeLifetime = 300,IdentityTokenLifetime = 300,RequireConsent = false,FrontChannelLogoutUri = frontChannelLogoutUri,RequireClientSecret = requireClientSecret,RequirePkce = requirePkce},autoSave: true);
这里AbsoluteRefreshTokenLifetime和AccessTokenLifetime分别为刷新令牌和访问令牌的有效期,单位为秒。ABP默认为一年,通常我们希望令牌有效期更短一些,可依据我们的业务对这两个值做出修改,例如刷新令牌有效期为七天,访问令牌有效期为两个小时。
完成以上修改后,我们运行Demo.Identity.DbMigrator项目,将新定义的客户端写入数据库中。
3 添加登录相关接口
在Demo.Identity.IdentityServer项目中添加文件夹Dto存放各接口数据传输对象
在Dto文件夹中添加用户名密码登录请求类PasswordLoginRequest如下:
using System.ComponentModel.DataAnnotations;namespace Demo.Identity.Dto;/// <summary>/// 用户名密码登录请求/// </summary>public class PasswordLoginRequest{/// <summary>/// 用户名/// </summary>[Required]public string UserName { get; set; }/// <summary>/// 密码/// </summary>[Required]public string Password { get; set; }}
在Dto文件夹下添加登录响应LoginResponse,这里我们使用C#9.0中的record实现,也可以使用普通类实现,代码如下:
namespace Demo.Identity.Dto;/// <summary>/// 登录响应实体/// </summary>/// <param name="AccessToken">访问令牌</param>/// <param name="RefreshToken">刷新令牌</param>/// <param name="ExpireInSeconds">有效期(秒)</param>/// <param name="HasError">是否异常</param>/// <param name="Message">异常消息</param>public record LoginResponse(string AccessToken = "",string RefreshToken = "",int ExpireInSeconds = 0,bool HasError = false,string Message = "");
如果我们使用刷新Token机制,则需要添加刷新Token请求实体,在Dto文件夹下添加RefreshTokenRequest类如下:
namespace Demo.Identity.Dto;/// <summary>/// 刷新令牌请求/// </summary>public class RefreshTokenRequest{/// <summary>/// 刷新令牌/// </summary>public string RefreshToken { get; set; }}
using System;using Demo.Identity.Dto;using Microsoft.AspNetCore.Mvc;using Microsoft.AspNetCore.Mvc.Filters;namespace Demo.Identity;/// <summary>/// 自定义登录异常/// </summary>public class LoginException : Exception{/// <summary>/// 自定义登录异常/// </summary>/// <param name="message">异常信息</param>public LoginException(string message) : base(message){}}/// <summary>/// 登录异常过滤器/// </summary>public class LoginExceptionFilter : ExceptionFilterAttribute{/// <summary>/// 自定义登录异常处理/// </summary>/// <param name="context"></param>public override void OnException(ExceptionContext context){if (context.Exception is LoginException){context.Result = new JsonResult(new LoginResponse{HasError = true,Message = context.Exception.Message}){StatusCode = 401};context.ExceptionHandled = true;}}}
using System;using System.Net.Http;using System.Threading.Tasks;using Demo.Identity.Dto;using IdentityModel.Client;using Microsoft.AspNetCore.Mvc;using Microsoft.Extensions.Configuration;using Volo.Abp.AspNetCore.Mvc;namespace Demo.Identity.Controllers;/// <summary>/// 用户登录控制器/// </summary>[ApiController][Route("api/[controller]/[action]")]public class AuthController : AbpController{private readonly IConfiguration _configuration;public AuthController(IConfiguration configuration){_configuration = configuration;}/// <summary>/// 检查IdentityServer服务链接并获取相关接口地址/// </summary>/// <returns></returns>/// <exception cref="Exception"></exception>private async Task<DiscoveryDocumentResponse> CheckIdsService(){var client = new HttpClient();var disco = await client.GetDiscoveryDocumentAsync(new DiscoveryDocumentRequest{ Address = _configuration["AuthService"], Policy = { RequireHttps = false } });if (disco.IsError){throw new LoginException("身份认证服务链接失败");}return disco;}/// <summary>/// 用户名密码登录/// </summary>/// <param name="request">请求实体</param>/// <returns>登录响应</returns>[HttpPost][LoginExceptionFilter]public async Task<LoginResponse> Login([FromBody] PasswordLoginRequest request){var disco = await CheckIdsService();var tokenResponse = await new HttpClient().RequestPasswordTokenAsync(new PasswordTokenRequest{Address = disco.TokenEndpoint,ClientId = "Demo_App",ClientSecret = "1q2w3e*",UserName = request.UserName,Password = request.Password,Scope = "openid offline_access"});if (tokenResponse.IsError){throw new LoginException("用户名密码错误");}return new LoginResponse{AccessToken = tokenResponse.AccessToken,RefreshToken = tokenResponse.RefreshToken,ExpireInSeconds = tokenResponse.ExpiresIn};}/// <summary>/// 刷新令牌/// </summary>/// <param name="request"></param>/// <returns></returns>[HttpPost][LoginExceptionFilter]public async Task<LoginResponse> RefreshToken([FromBody] Dto.RefreshTokenRequest request){var disco = await CheckIdsService();var tokenResponse = await new HttpClient().RequestRefreshTokenAsync(new IdentityModel.Client.RefreshTokenRequest(){Address = disco.TokenEndpoint,ClientId = "Demo_App",ClientSecret = "1q2w3e*",RefreshToken = request.RefreshToken,Scope = "openid offline_access"});if (tokenResponse.IsError){throw new LoginException("RefreshToken已过期");}return new LoginResponse{AccessToken = tokenResponse.AccessToken,RefreshToken = tokenResponse.RefreshToken,ExpireInSeconds = tokenResponse.ExpiresIn};}}
"AuthService": "http://localhost:4100"{"UserName":"admin","Password":"1q2w3E*"}
测试访问成功,可得到AccessToken和RefreshToken。
将此处得到的RefreshToken作为刷新令牌接口测试参数,测试如下:Post方式访问/api/auth/refreshtoken接口,Body使用JSON格式并写入以下数据:
{"RefreshToken":"E4AEAE2……"}
测试得到一组新的AccessToken和RefreshToken,则表示所有接口测试通过。
附 刷新令牌机制用法
在以上服务中,客户端通过用户名密码,可以拿到AccessToken和RefreshToken,即访问令牌和刷新令牌。正常访问接口时,我们只需要使用AccessToken用于身份认证。但AccessToken有效期较短,超过有效期后会报401错误。这时,我们可以使用之前拿到的RefreshToken使用刷新令牌接口,换取一组新的AccessToken和RefreshToken,同时AccessToken和RefreshToken的有效期将被重置。若此时RefreshToken已过期,则需要重新登录。
例如在手机端APP使用场景中,我们设置AccessToken有效期为两个小时,RefreshToken有效期为7天。正常使用情况下,用户不需要每天重新登录,如果用户连续7天未使用,则RefreshToken过期,需重新登录,若经常使用则不会出现这个情况。
如果传输中AccessToken被恶意截取,其他人也只有两个小时的使用时间。同时,这个机制也在保证用户不需要反复登录的同时客户端不需要保留用户名密码信息。
