背景
前言
本系列文章面向移动开发小白,从零开始进行平台相关功能开发,演示如何参考平台的官方文档使用MAUI技术来开发相应功能。
介绍
Apple 推送通知服务(Apple Push Notification service),简称 APNs。与之前Android使用个推不同,由于APNs国内可用,所以我们可以直接使用APNs来实现远程消息推送,不依赖其他第三方组件和服务。我们这里推送使用的是p8证书,p8证书相对p12证书来讲,更灵活,而且没有p12证书有效期1年的限制。
一、实现方式
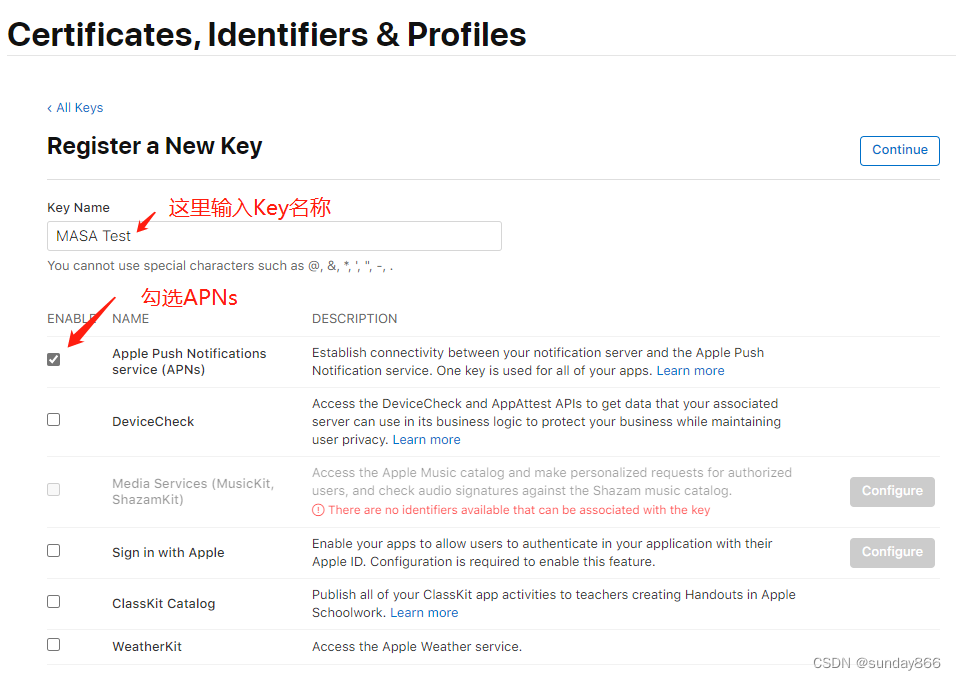
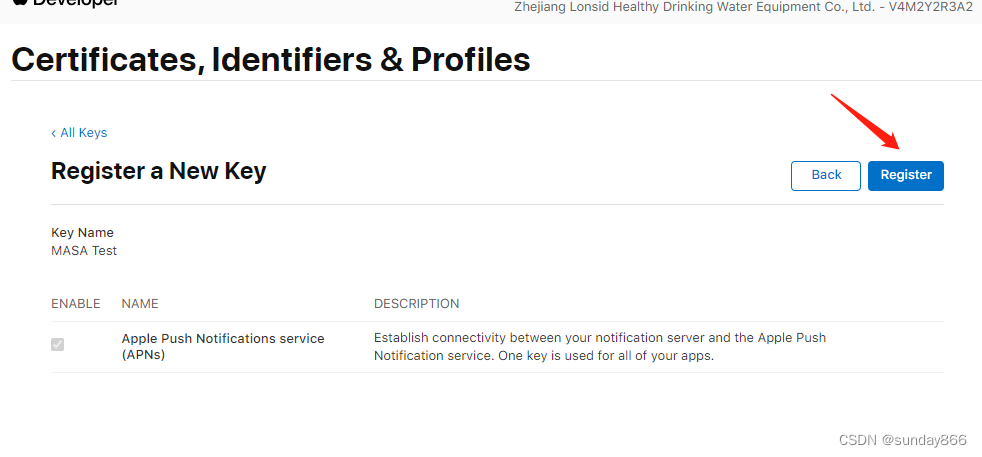
一、申请p8证书
https://developer.apple.com/
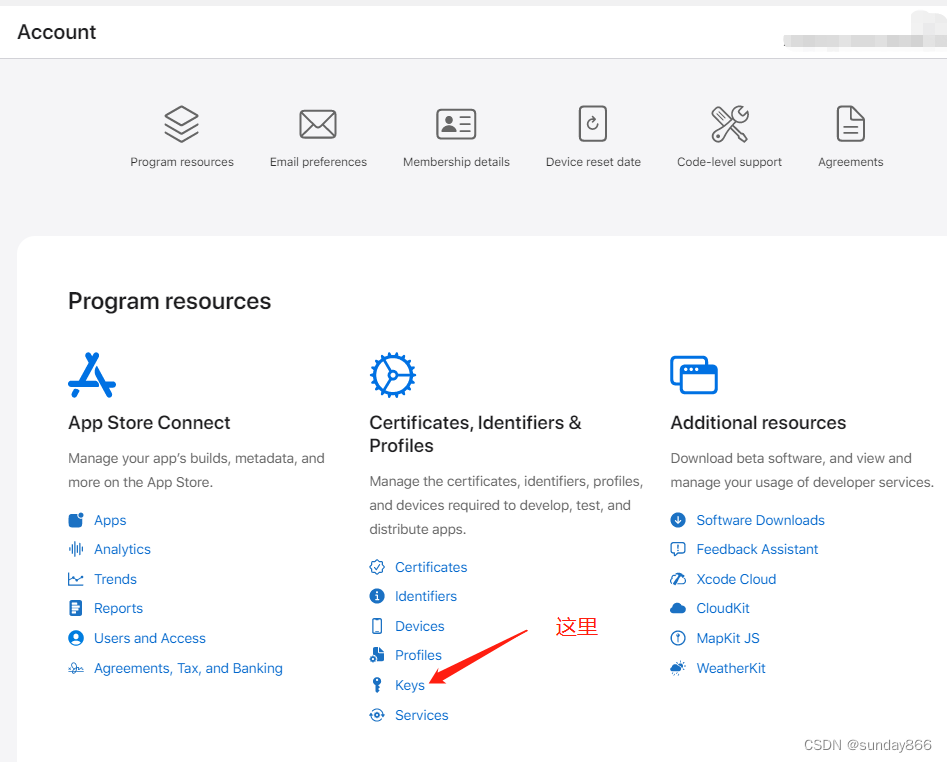
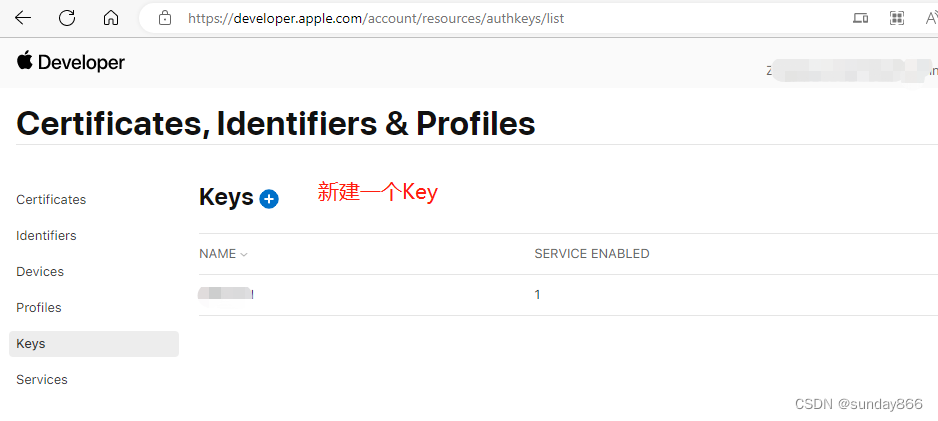
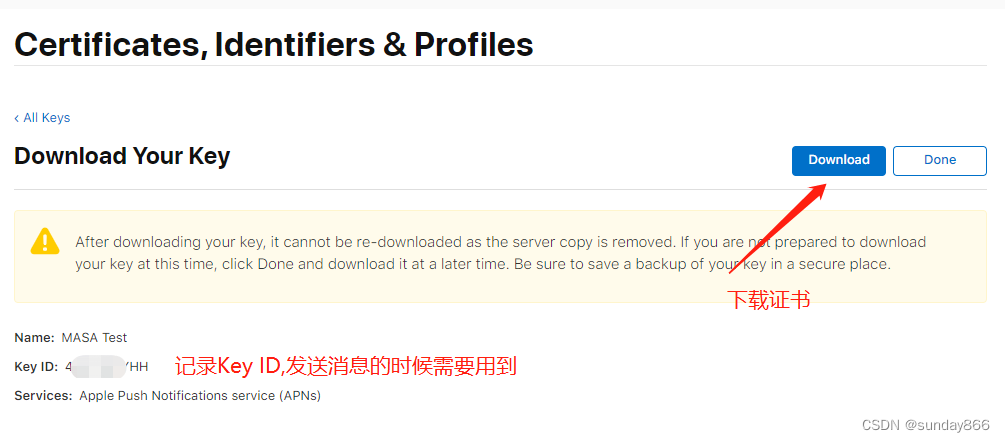
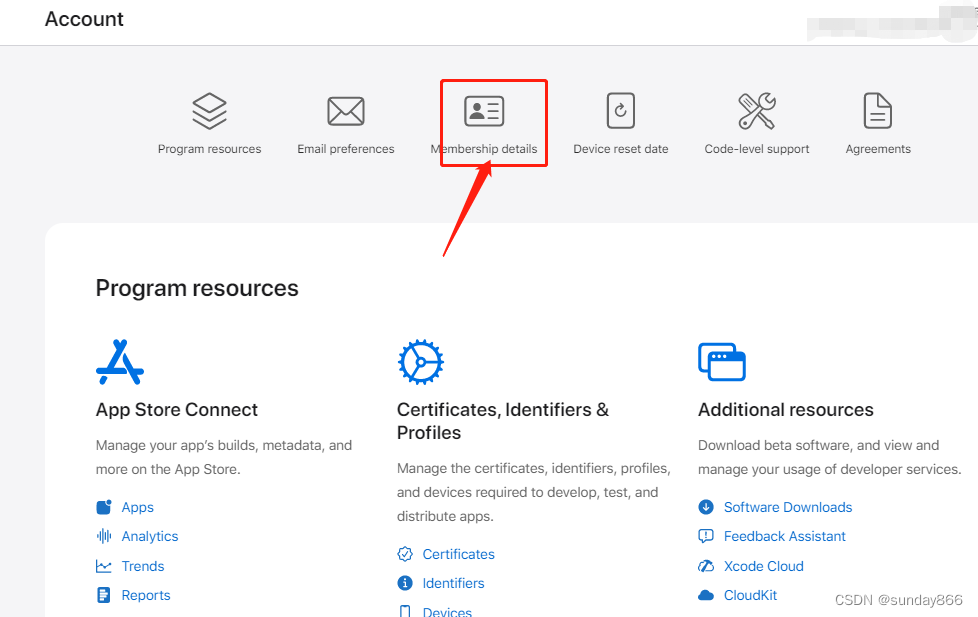
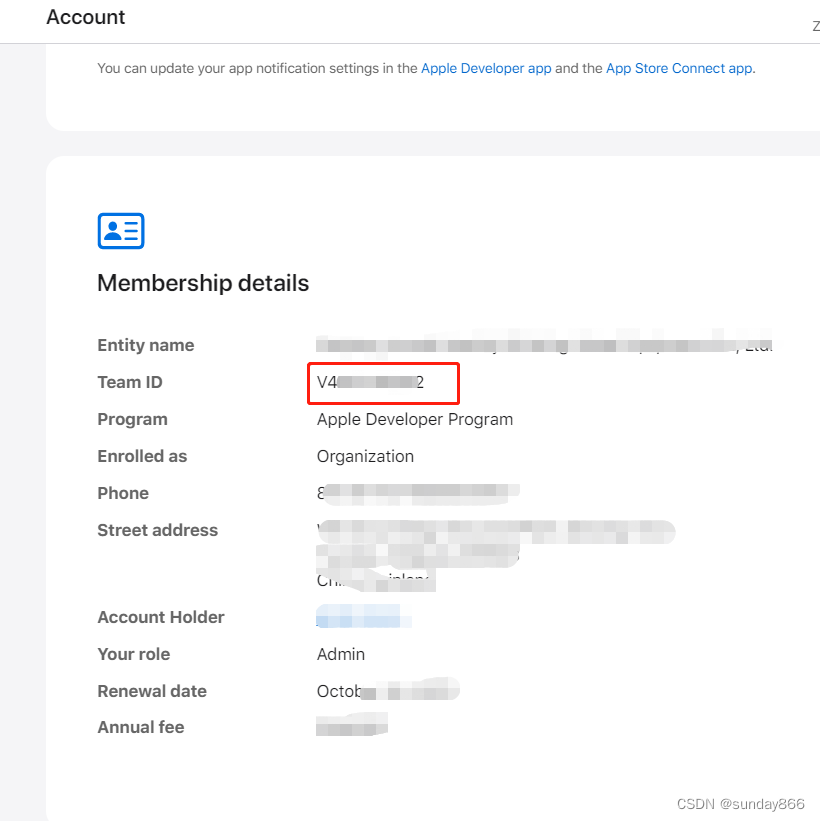
1、登录开发者中心,点击右上角Account,找到Keys管理
二、编写MAUI实现代码
参考官方文档:https://developer.apple.com/documentation/usernotifications/registering_your_app_with_apns
(由于受打包长度影响,项目名称和文件夹名称,我这里尽量简短。路径长度超过255会导致编译时提示部分文件找不到。)
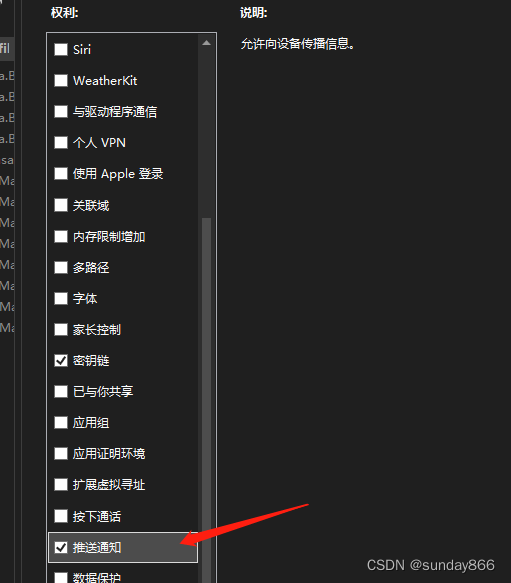
我们找到Platforms->iOS->Info.plist文件,双击用默认的iOS清单编辑器打开,勾选“启用后台模式”和“远程通知”。这项操作会在Info.plist文件中添加如下信息:
<key>UIBackgroundModes</key><array><string>remote-notification</string></array>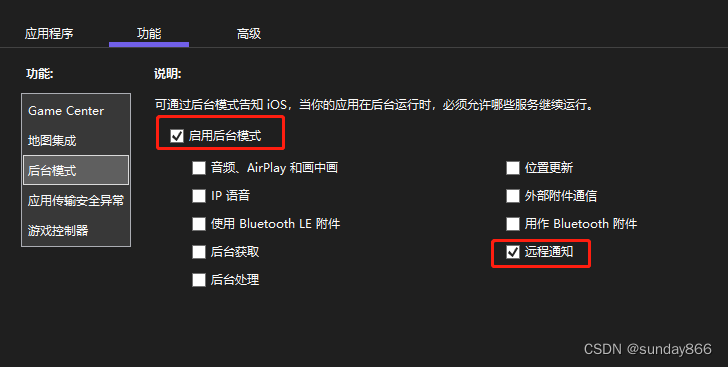
<?xml version="1.0" encoding="UTF-8"?><!DOCTYPE plist PUBLIC "-//Apple//DTD PLIST 1.0//EN" "http://www.apple.com/DTDs/PropertyList-1.0.dtd"><plist version="1.0"><dict><key>aps-environment</key><string>development</string></dict></plist>注意:这项配置的目的是在development环境支持推送,如果在项目发布的时候,MAUI不会自动清除,需要手动关闭或注释掉这项配置,否则会报错。
2、编写实现代码
参考文档 https://developer.apple.com/documentation/usernotifications/registering_your_app_with_apns
Swift代码func application(_ application: UIApplication, didFinishLaunchingWithOptions launchOptions: [UIApplicationLaunchOptionsKey: Any]?) -> Bool { // Override point for customization after application launch.you’re UIApplication.shared.registerForRemoteNotifications() return true}func application(_ application: UIApplication, didRegisterForRemoteNotificationsWithDeviceToken deviceToken: Data) { self.sendDeviceTokenToServer(data: deviceToken)}func application(_ application: UIApplication, didFailToRegisterForRemoteNotificationsWithError error: Error) { // Try again later.}向APNs注册设备
[Register("AppDelegate")] public class AppDelegate : MauiUIApplicationDelegate { protected override MauiApp CreateMauiApp() => MauiProgram.CreateMauiApp(); public override bool FinishedLaunching(UIApplication application, NSDictionary launchOptions) { UNUserNotificationCenter center = UNUserNotificationCenter.Current; var options = UNAuthorizationOptions.Alert | UNAuthorizationOptions.Sound | UNAuthorizationOptions.CriticalAlert; // Request notification permissions from the user center.RequestAuthorization(options, (bool success, NSError error) => { // Handle approval } ); UIApplication.SharedApplication.RegisterForRemoteNotifications(); return base.FinishedLaunching(application, launchOptions); } }UNUserNotificationCenter 仅适用于 iOS 10+,但是考虑到基本没人用低于10的版本了,这里我们就不做版本检查了
用户可以批准应用的三个不同级别的通知请求:
横幅显示-Alert 。
声音警报-Sound 。
对应用图标进行错误设置-CriticalAlert。
注册成功后我们通过application:didRegisterForRemoteNotificationsWithDeviceToken: 方法获取device token,但是由于这个方法是在UIApplication下,但是我们的AppDelegate是继承自
MauiUIApplicationDelegate ,默认没有这个方法,我们可以通过Export特性,导出我们需要的方法,继续在AppDelegate中添加
[Export("application:didFailToRegisterForRemoteNotificationsWithError:")] public void FailedToRegisterForRemoteNotifications(UIKit.UIApplication application, NSError error) { Console.WriteLine("FailedToRegisterForRemoteNotifications"); } [Export("application:didRegisterForRemoteNotificationsWithDeviceToken:")] public void RegisteredForRemoteNotifications(UIKit.UIApplication application, Foundation.NSData deviceToken) { var token = ExtractToken(deviceToken); Preferences.Default.Set("PushToken", token); Console.WriteLine(token); } private string ExtractToken(NSData deviceToken) { if (deviceToken.Length == 0) return null; var result = new byte[deviceToken.Length]; System.Runtime.InteropServices.Marshal.Copy(deviceToken.Bytes, result, 0, (int)deviceToken.Length); return BitConverter.ToString(result).Replace("-", ""); }我们通过Preferences.Default.Set将token存储起来,方便在登录等业务中使用。
接收远程推送
[Export("application:didReceiveRemoteNotification:fetchCompletionHandler:")] public void DidReceiveRemoteNotification(UIKit.UIApplication application, NSDictionary userInfo, Action<UIKit.UIBackgroundFetchResult> completionHandler) { foreach (var item in userInfo) { var alertMsg = ((NSDictionary)item.Value)["alert"]; Console.WriteLine($"alertMsg:{alertMsg}"); } Console.WriteLine("DidReceiveRemoteNotification"); }其实我们在方法内部不需要写任何代码,就可以实现基本的推送功能。但如果想处理推送过来的消息,可以通过NSDictionary类型userInfo中拿到。这里示例从alert中拿到具体的消息内容,并打印。
三、编写演示代码
@page "/"<button @onclick="GetDeviceToken">Get Device Token</button><text>@deviceToken</text>@code{ private string deviceToken { get; set; } private void GetDeviceToken() { deviceToken= Preferences.Default.Get("PushToken",string.Empty); }}四、服务端测试
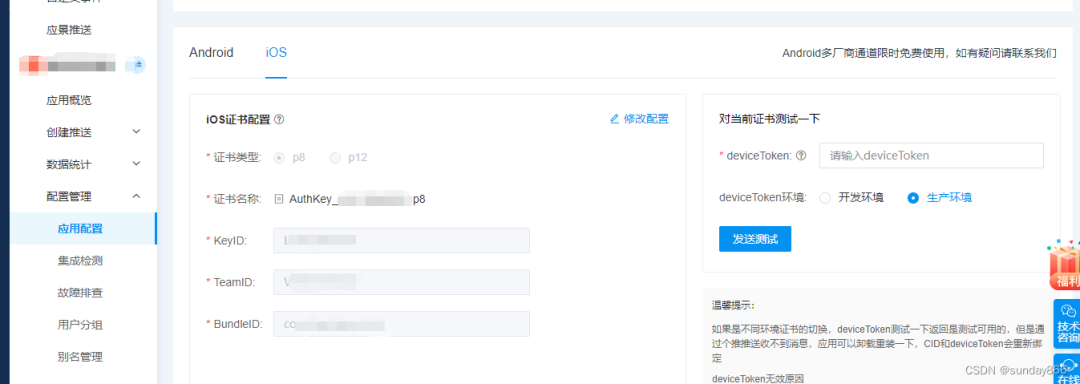
我们可以通过个推的在线测试工具,配置好p8证书和其他参数。
我这里写了一个命令行的测试程序,这里使用了第三方的PushNotifications.Server包
using PushNotifications.Server.Apple;Console.WriteLine("Hello, World!");IApnsClient apnsClient = new ApnsClient(new ApnsJwtOptions{ CertContent = "-----BEGIN PRIVATE KEY-----\r\nxxxxxxxxxxxxxxxxxxxxxxxxxxxxxxxxxxxxxxxxxxxxxxxxxxxxxxxxxxxxxxxxxxxxxxxxxxxxxxxxxxxxxxxxxxxxxxxxxxxxxxxxxxxxxxxxxxxxxxxxxxxxxxxxxxxxxxxxxxxxxxxxxxxxxxxxxxxxxx\r\n-----END PRIVATE KEY-----", KeyId = "LUxxxxxxxx", TeamId = "V4xxxxxxxx", BundleId = "com.iOSPush.Sample", UseSandbox = true});var apnsRequest = new ApnsRequest(ApplePushType.Alert) .AddToken("47006118F8xxxxxxxxxxxxxxxxxxxxxxxxxxxxxxxxxxxxxxxxxxxxxxxxxxxxxx") .AddSound() .AddAlert("MASA", $"Message @ {DateTime.Now}", $"Message @ {DateTime.Now}");var apnsResponse = await apnsClient.SendAsync(apnsRequest);Console.ReadKey();五、演示效果
可以看出,应用打开的状态不会收到推送,后台运行或者划掉关闭都可以收到通知。
