前言
在 Web 应用程序开发过程中,总是无法避免涉及到文件上传,这次我们来聊一聊怎么去实现一个简单方便可复用文件上传功能;通过创建自定义绑定模型来实现文件上传。
一、实现自定义绑定模型
1.1、 在 Asp.Net Core MVC 中,内置了很多种绑定模型,让我们可以很方便的去使用,比如下面常用的几种绑定模型.
FromBodyAttributeFromFromAttributeFromQueryAttributeFromHeaderAttributeFromServicesAttributeFromRouteAttribute
常见用法比如
[HttpPost]public async Task<IActionResult> PostInfo([FromBody]UserInfo user,[FromQuery] string city){...}
查看以上绑定模型,唯独缺少一个 FromFileAttribute ,下面就来实现一个自己的 FromFileAttribute
public class FromFileAttribute : Attribute, IBindingSourceMetadata{public BindingSource BindingSource => BindingSource.FormFile;}
非常简单,就三行代码,完全照抄系统内置的绑定模型,唯一不同的就是指定 BindingSource 为 BindingSource.FormFile。
二、实现一个上传文件实体类,专门用于接收客户端参数
2.1 、创建 UserFile
public class UserFile{public string FileName { get; set; }public long Length { get; set; }public string Extension { get; set; }public string FileType { get; set; }private readonly static string[] Filters = { ".jpg", ".png", ".bmp" };public bool IsValid => !string.IsNullOrEmpty(this.Extension) && Filters.Contains(this.Extension);private IFormFile file;public IFormFile File{get { return file; }set{if (value != null){this.file = value;this.FileType = this.file.ContentType;this.Length = this.file.Length;this.Extension = this.file.FileName.Substring(file.FileName.LastIndexOf('.'));if (string.IsNullOrEmpty(this.FileName))this.FileName = this.FileName;}}}public async Task<string> SaveAs(string destinationDir = null){if (this.file == null)throw new ArgumentNullException("没有需要保存的文件");if (destinationDir != null)Directory.CreateDirectory(destinationDir);var newName = DateTime.Now.Ticks;var newFile = Path.Combine(destinationDir ?? "", $"{newName}{this.Extension}");using (FileStream fs = new FileStream(newFile, FileMode.CreateNew)){await this.file.CopyToAsync(fs);fs.Flush();}return newFile;}}
UserFile 是一个带保持文件行为的实体类,该类的公共属性用于从表单域中接收和属性名称相同的表单值,其中公共属性 File 用于接收文件,并在设置值的时候去做一些其它属性初始化的工作,比如文件长度和扩展名、文件类型
其中还实现了一个简单的文件过滤器,判断客户端上传的文件是否属于服务端允许上传的文件扩展名
最后 SaveAs(string destinationDir = null) 通过传入指定目录,将文件保存,并返回保存后的文件绝对路径
三、上传文件
3.1、下面就定义一个简单的 API 接口,用于测试上传文件
[HttpPost]public async Task<IActionResult> Post([FromFile]UserFile file){if (file == null || !file.IsValid)return new JsonResult(new { code = 500, message = "不允许上传的文件类型" });string newFile = string.Empty;if (file != null)newFile = await file.SaveAs("/data/files/images");return new JsonResult(new { code = 0, message = "成功", url = newFile });}
3.2、首先是在 Post([FromFile]UserFile file) 中使用上面创建的 FromFileAttribute 对模型 UserFile 进行绑定,然后验证文件是否正确,接下来通过 file.SaveAs("/data/files/images"); 保存文件
3.3 、上传代码非常简单,几乎到了无法精简的程度,最终发挥作用的就是 file.SaveAs 操作
四、上传测试
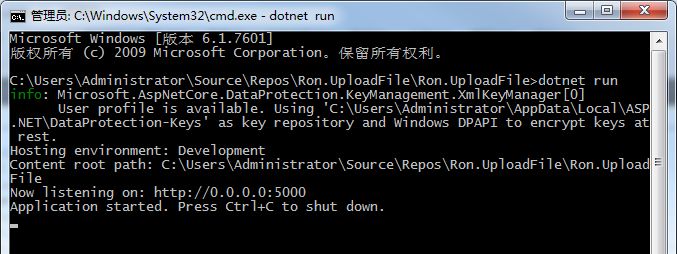
4.1 现在通过控制台启动服务
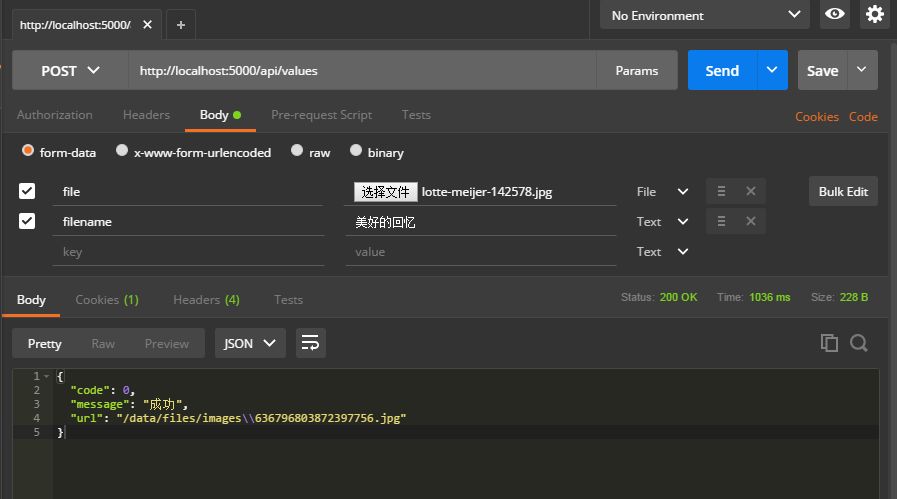
4.2 使用 Postman 模拟表单上传文件
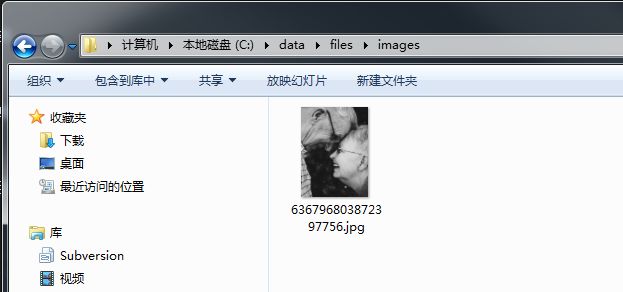
4.3 上传成功,现在来查看目录下是否有文件
结语
-
在上传表单中,我们定义了附件的名称为 file 对应绑定模型的公共属性 File,这样模型就可以自动获得该文件
-
表单中还传递了另外一个字段 filename,对应绑定模型的公共属性 FileName,实现自定义文件友好显示名称
-
通过自定义模型绑定,实现了快速上传文件功能,该功能只能用于上传小文件,对于大文件,还是需要实现分片上传,或者使用 CDN 等服务商的接口
示例代码下载
https://files.cnblogs.com/files/viter/Ron.UploadFile.zip
